# Simple REST Host
Assemble and publish a REST web service endpoint by implementing its web methods through events using SimpleRESTHost.
***
## Properties
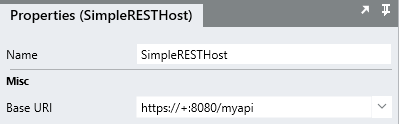
### Base URI
The Base URL of the web service must be configured to be hosted on the server that it is deployed to.
To achieve this in Linx, use the `+` wildcard character instead of your hostname in the Base URL property.
`https://+:{port}/{path}`
When the service is deployed it will use the current server.
### Security
The security scheme to use.
*API Key* and *HTTP Bearer* are supported.
When hosting a web service you need to indicate what the security requirements are for granting clients access to your web service.
When selecting the *API Key* security scheme it means that:
a) a client that consumes your web service must provide a key value that is associated with your API, and
b) your application must authenticate the key value that is received from the client.
Your web service application will receive the API key via a request header, named 'Authorization', that Linx makes available at `=$.Input.Data.AuthenticationData.ApiKey.ProvidedToken`.
Authentication of the received key is performed in the SimpleRESTHost service's *OperationEvents\_Authenticate* event handler.
Do the following:
1. Set a String variable to `$.Input.Data.AuthenticationData.ApiKey.ProvidedToken`.
2. If the required key is stored in a database, check if the provided key matches the key in the database.
3. If there is a match, set `$.Output.Data.HttpContext.User.IsAuthenticated` to 'true'.
### Bearer secret
Only available when *'HTTP Bearer'* is selected for the Security property.
The HTTP bearer secret key, for issuing and authenticating security tokens.
***
### Operations
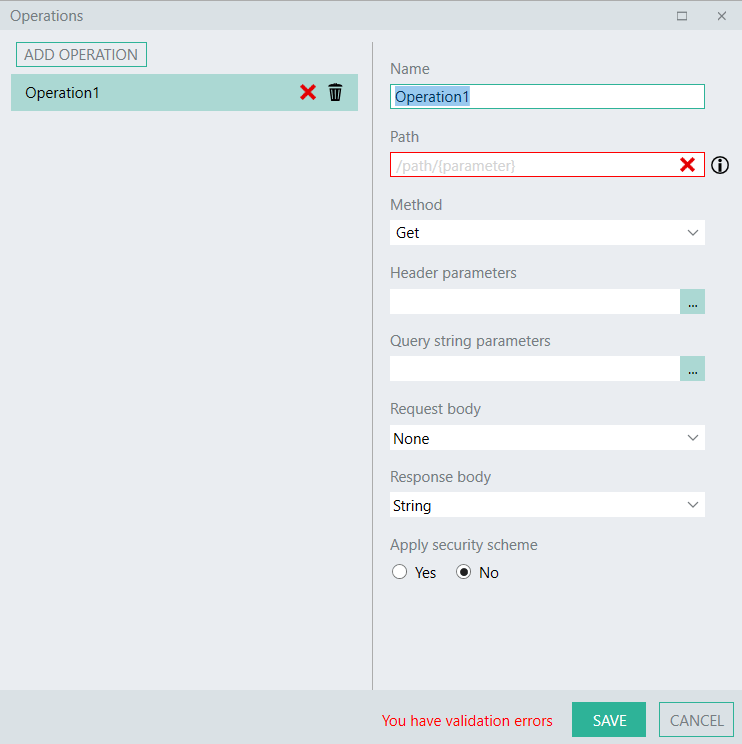
Define your web API operations. Click on the Operations Editor icon \[...] to add your operations.
**Operations properties**
The following properties are available in the Operations Editor:
* **Name**: Enter a descriptive name for the operation.
* **Path**: The path for where the operation can be accessed, in the format `/path/{parameters}`.
* **Header parameters**: Specify the headers that are expected from requests. Click on the `...` icon to add Header Parameters.
* **Query string parameters**: Specify the Query string parameters that are expected from requests. Click on the `...` icon to add Query String Parameters.
* **Request body**: The supported data types for the request. Select from the drop-down list.
* **Response body**: The supported data types for the response. Select from the drop-down list.
* **Apply security scheme**: The security scheme is associated with your selection in the [Security](#security) property. For each operation you can decide if the selected security scheme should be applied to the specific operation or not. Select 'Yes' to apply the security scheme to your operation.
Click the **ADD OPERATION** button to add more operations.
***
### Show server errors
Hide or show details for internal server errors in HTTP responses. Note that this is a security consideration for production systems.
Options:
* true
* false
### Max connections
The maximum number of concurrent connections to accept (per client). Use `-1` for infinite, or null to use the machine wide setting from the registry. The default value is null. For more details on how to find out what the registry default is, go [here](https://docs.microsoft.com/en-us/troubleshoot/iis/httpsys-registry-windows).
### Max request size
The maximum allowed size of any request body, in megabytes.
*Default:* 30
### API documentation
Select to generate documentation for your API.
Options:
* Redocly
* Swagger UI
To access your generated documentation, append `/swagger` or `/redocly` to your Base URI, depending on the documentation type.
For more on API documentation go [here](https://docs.linx.software/guides/rest-documentation).
### CORS origins
A list of allowed origin URLs for cross-origin resource sharing.
Click the editor icon to add relevant URLs.
### Authenticate
Select to show the Authenticate event handler. This handler will execute for every authentication scheme associated with an operation, before the execution of the operation.
### Before operation
Select to show the Before-Operation event handler. This handler will execute before the execution of any operation.
### After operation
Select to show the After-Operation event handler. This handler will execute after the execution of any operation.
***
## Links
[OpenAPI Specification](https://swagger.io/specification/)
[Wikipedia: Representation state transfer (REST)](http://en.wikipedia.org/wiki/Representational_state_transfer)
[Swagger](https://swagger.io/)
[Linx REST Guide](https://docs.linx.software/guides/rest)
---
# Agent Instructions: Querying This Documentation
If you need additional information that is not directly available in this page, you can query the documentation dynamically by asking a question.
Perform an HTTP GET request on the current page URL with the `ask` query parameter:
```
GET https://docs.linx.software/reference/plugins/rest/content/simpleresthost.md?ask=
```
The question should be specific, self-contained, and written in natural language.
The response will contain a direct answer to the question and relevant excerpts and sources from the documentation.
Use this mechanism when the answer is not explicitly present in the current page, you need clarification or additional context, or you want to retrieve related documentation sections.